Homeassistant Fullsize Create dashboard without scroll edges
Introduction
For my entrance I would like a tablet with my have room plan and the appropriate control options. Accordingly, I wanted to create a simple dashboard with which I can see the most important information of my apartment right away... In I will document how this has been done with me.
The space plan
I have a simple plan with the website RoomSketcher made... but also works with paint and actually everything can paint some lines. Unlike many dashboards, I have I don't care about the furniture that I'll handle later on icons to be able to access functionalities.
My room plan looks as follows:
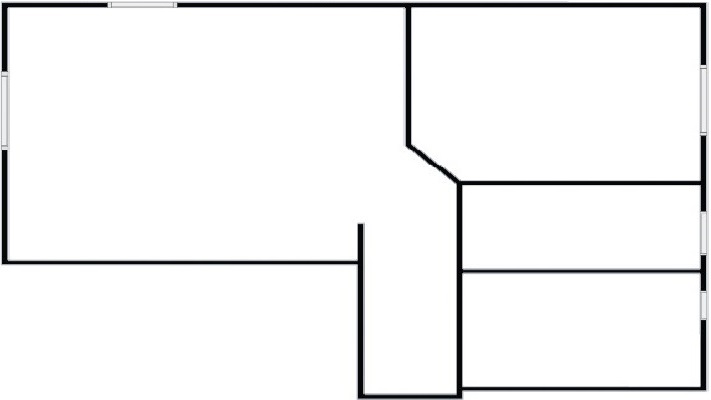
What is important here is that the spatial plan is based on the side conditions of the Retains screens... In my case, there are 16:9 with my taboo and 21:9 for my smartphone... Otherwise the View Type works Homeassistant unfortunately not correct and you would have to manually change with Card-Mods...
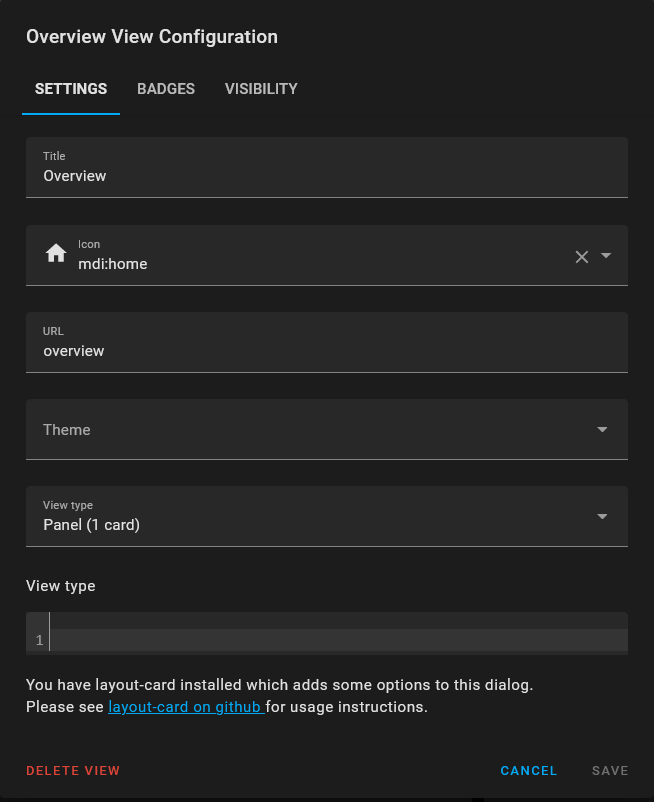
Create a dashboard
Next we start with Settings > Dashbaords new dashboard and put the view type on ‘Panel’ – this will only a card on the surface, which is why it is also important that the image has the copractice side conditions, since the card size of the screen does not know.
Set a background image
First of all, we want to present our ground plan on our dashboard, for which we use one Picture Card(Picture Elements Card) – Here we define a background and can place on this then almost everything everywhere as we want. This is done with fixed values.

Fill the dashboard with data
In my case, I will now be the dashboard with some Fill temperature values, performance values and window statuses that make I'm using the integrated YAML editor as I'm clear find more clearly and some options not in the visual editor available...
Below is the commented dashboard with window status, temperatures and performance values.
It Note that the entities may differ from you and otherwise, they must be adapted...
views:
  - theme: Backend-selected
    title: Overview
    icon: mdi:home
    path: overview
    panel: false
    type: panel
    visible:
      - user: 7b159f5a8b18411094bcf4829d3ecc4f #Für diese User ist das Dashboard sichtbar
      - user: 9a12a15b2d934d00ac37bd618f71ea59
    badges: []
    cards:
      - type: picture-elements # die picture elementscard mit dem Raumplan
        panel: true # Anzeige im Panelmodus
        image: http://hass.jr.local:8123/local/pictures/Raumskizze_1.svg #Das Bild müsst ihr manuell hochladen, siehe dafür diese Anleitung
        elements:
# FENSTER
          - type: conditional # je nachdem wie das Fenster gekippt ist, wird ein anderer State dargestellt
            conditions:
              - entity: binary_sensor.fensterkontaktbad_ias_zone # Entity Name des Fenstersensors
                state: 'off' # welchen State der sensor haben soll, damit die Bedingung true ist
            elements:
              - type: icon
                icon: mdi:minus # Ein farbiges Icon zeigt den Status
                style:
                  color: lightgreen # Farbe des Streifens
                  top: 75% # Position
                  left: 98%
                  transform: rotate(90deg) scale(5.1,1.8) # drehen, da vertikal
# Das selbe im folgenden nur das zwischen ganz offen und gekippt entschieden werden muss - siehe dazu meinen Blogbeitrag
          - type: conditional
            conditions:
              - entity: binary_sensor.fensterkontaktbad_ias_zone
                state: 'on'
              - entity: input_boolean.fensterkontaktbadistgekippt
                state: 'on' # wenn gekippt sensor aktiv dann true
            elements:
              - type: icon
                icon: mdi:minus
                style:
                  color: orange
                  top: 75%
                  left: 98%
                  transform: rotate(90deg) scale(5.1,1.8)
          - type: conditional
            conditions:
              - entity: binary_sensor.fensterkontaktbad_ias_zone
                state: 'on'
              - entity: input_boolean.fensterkontaktbadistgekippt
                state: 'off' # wenn fenstergekippt sensor false dann ist das Fenster geschlossen
            elements:
              - type: icon
                icon: mdi:minus
                style:
                  color: red
                  top: 75%
                  left: 98%
                  transform: rotate(90deg) scale(5.1,1.8)
          #[...] - hier sind noch alle anderen Fenster definiert, das habe ich der länge aber herausgeschnitten
          - type: state-label
            entity: sensor.steckdosemediacenter_electric_consumption_w
            style:
              top: 4%
              left: 7%
          # hier die Anzeige für momentante Verbräuche auch hier einiges rausgenommen
          - type: state-label
            entity: sensor.steckdosehwrittechnik_electric_consumption_w
            style:
              top: 59%
              left: 95%
              transform: rotate(90deg)
         #für die optik ein Thermometer Icon
          - type: icon
            icon: mdi:thermometer # die Icons könnt ihr hier finden - eine Community Seite, welche gerade hier sehr hilfreich ist...
            style:
              color: white
              top: 30%
              left: 25%
              transform: scale(1.4,1.4) # Das icon soll etwas größer dargestellt werden, daher ein Scale Up
          - type: state-label
            entity: sensor.fensterkontaktkuecherechts_temperature
            style:
              top: 35.5%
              left: 26.5%
#[...]
  - theme: Backend-selected
    title: Leistung
    path: leistung
    visible:
      - user: 7b159f5a8b18411094bcf4829d3ecc4f
      - user: 9a12a15b2d934d00ac37bd618f71ea59
    badges: []
    cards:
      - type: gauge
        entity: sensor.steckdosehwrittechnik_electric_consumption_w
Result:
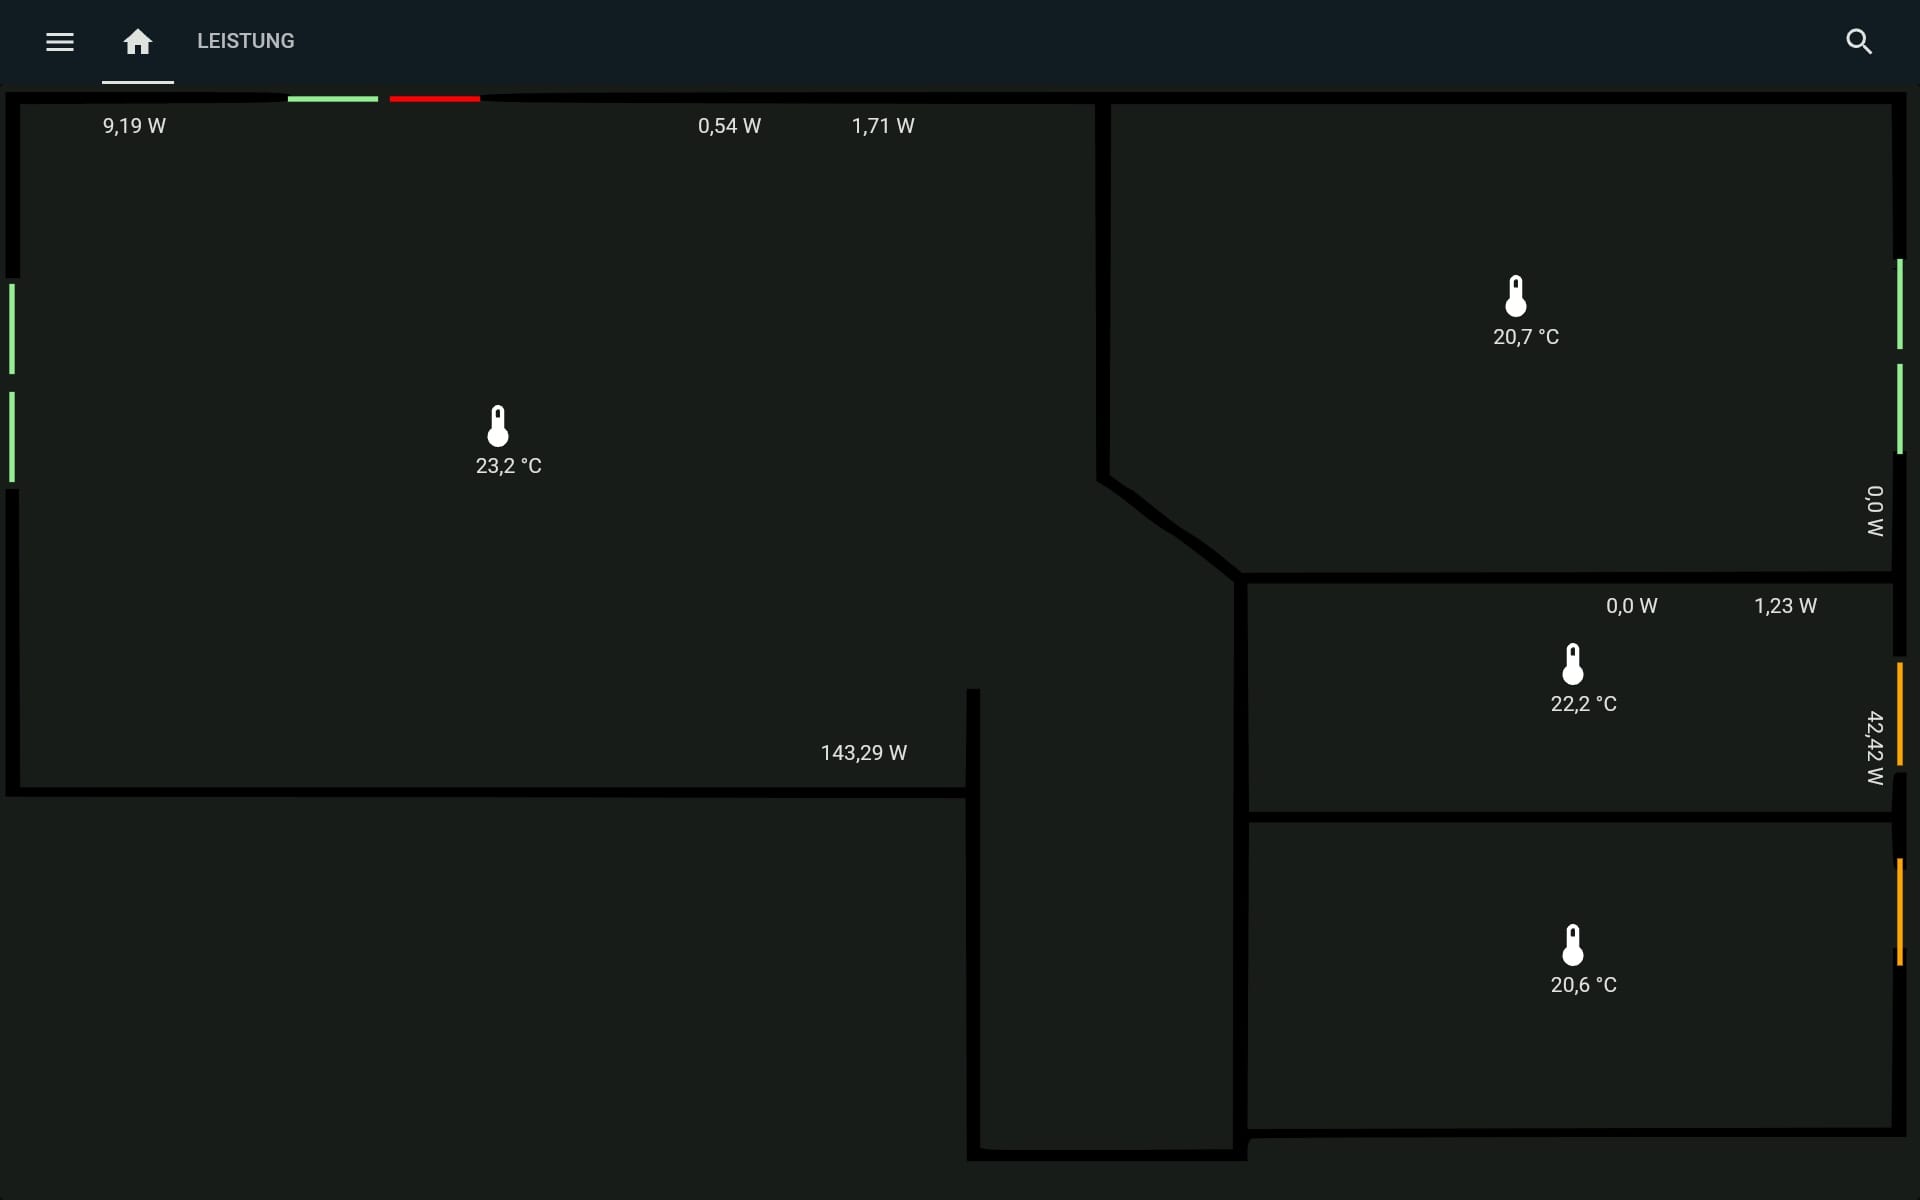
When everything's done, it looks like this:
Back…